Today Tuppet added some lights to the sturdy looking wireframe and it is really starting to shine. More lights will be added before installation.
Tuppet's cousin has been busy constructing a star to sit on top of our turret. We are very impressed with his work - he also constructed the mini trees in our front yard which we are very happy with. Today Tuppet added some lights to the sturdy looking wireframe and it is really starting to shine. More lights will be added before installation. 
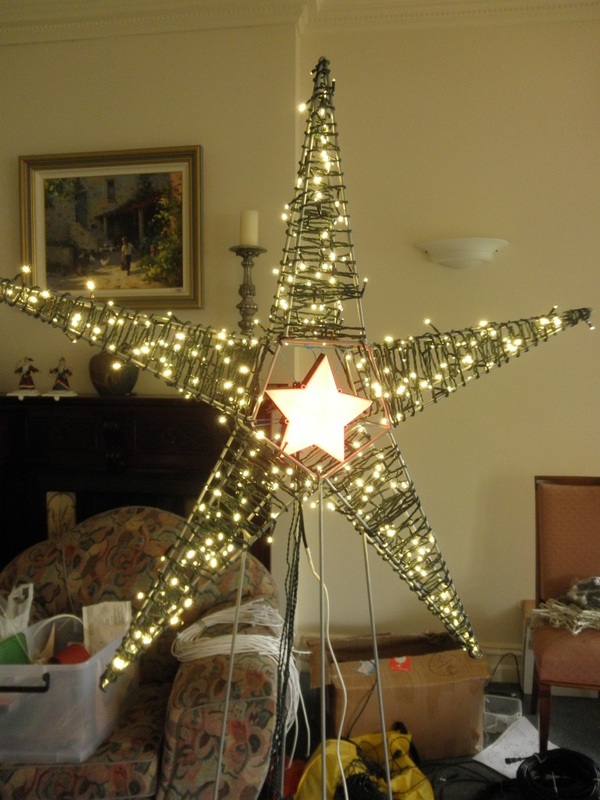
The whole thing is bigger than Tuppet, who can only just reach the top.
0 Comments
Today we received permission to fundraise for Starlight Children's Foundation. We will have a collection box outside. If you are visiting our lights please consider donating - all money raised will go directly to Starlight.
For the last two weeks we have been very busy mounting our lights. It is very exciting and we are very busy. Watch this space for pictures and video soon!
On a trip to New Zealand last Christmas we saw a wonderful large chandelier and decided that some chandeliers of our own would be a nice addition. At the Melbourne Mini we showed off a mega tree with a hanging basket tree topper, but really we had another use for the hanging baskets. The baskets are different sizes, and so have a different number of lights. The one shown on the left is the smaller of the two, which has 2 strings of 80 lights on it. The larger chandelier uses 3 strings. In the photo you can see the base has been completed but not the top. To get even spacing and lengths an equal distance was allowed between each pass below the basket (in this case 10 leds, which is equivalent to 1m). These hanging sections were then pulled taught to the top of the hanging chains. It was important to make sure that each line was pulled to the same tension to avoid a tilted chandelier; this meant that each section was tied to the hanging chain at a slightly different height with a cable tie for maximum flexibility. The ends were then wrapped up around the hanging chain and taped together to keep them neat all the way back to the controller. These also gave us the opportunity to use some y-connectors we had made so that despite using multiple strings to cover it the whole chandelier is only one output from our DMX boards. These make things much neater and give us the ability to wire things in quickly. As the installation process ramps up we are very happy to show off some of our tuppetstars. These RGB stars can be pretty much any colour - we set up a few as a demo: Meanwhile the rest of our light show is slowly emerging from boxes for another year.
Yesterday I mounted a piece of strip light along the roofline. I cabletied the lights to 10mm Aluminium strip and sat the strip on the nails which held up the rope light last year. On half of the strip I also attached 6mm coro as a diffuser. The vote here is divided on whether the lights look better with or without the coro. Surprisingly Mothertuppet likes the brighter uncovered lights, while Justin thinks they could be a bit much en masse so he voted for the coro. Tuppet quite likes the coro because it is a bit more forgiving on the straightness of the lights underneath, but at the same time it is an extra bit of work and it is more obvious during the day time, so her vote is as yet undecided.
An alternative mounting method I found during my testing (it was hard to get the 2m strip over all of the hooks while on my own up a ladder) was to lay the aluminium over the nails with the strip and coro on top. The sandwich meant that the lights were very straight while the fact you could only see the side of the lights reduced the intensity and light reflections. One quirk though... somehow Red and Green are swapped somewhere, so when you tell the lights to be red they turn on green. Small wiring issue to be corrected! |
AuthorTuppet and Tuppetsdad Archives
September 2021
Categories
All
|